Apps:
Secondary Master Schedule
'Web' - Master Schedule
Section Allocation
'Web' - Section Allocation
Course Request Verification Teacher Absence/OnCall 'Web' - Teacher Absence/OnCall Attendance Elementary Schedule
Course Request Verification Teacher Absence/OnCall 'Web' - Teacher Absence/OnCall Attendance Elementary Schedule

|
Attendance Assistant - HelpPete Self - peteself@nesterenkosoftware.com |
1. General Help Information
2. Creating the ClassesAbsentcsv file
1. Attendance Assistant - General Help Information
This page contains some Help and other information for the Attendance Assistant application.
Rationale: The application was developed to help with analyzing, tracking, communicationg and, hopefully, solving attendance issues within a school.
Reporting and analysis of school absence data. A variety of reports display Student Absence data (and, optionally, Marks) in a variety of sort orders. A vital report allows the user to generate a concise (typically one or two pages) linear report which would display only the students who have missed at least a specific number of classes in any course.
Eg. Linear list of all students who have missed at least 15 (or whatever value you would like to use) classes in any one course, sorted by Grade. This is a great report which Student Success teams use weekly to be able to quickly see attendance issues.
Note: This app existed when schools used Trillium®. The Trillium® version of this app had an option of beinbg able to generate Attendance Letters' to be sent home. This option is not available with this current Aspen® version since we have not been able to extract Parent Addresses, as we were in Trillium®.
This page contains various Help information information to help with extracting the necessary TranscriptCoursesAndMarks.csv and ClassesAbsent.csv files from Aspen®.
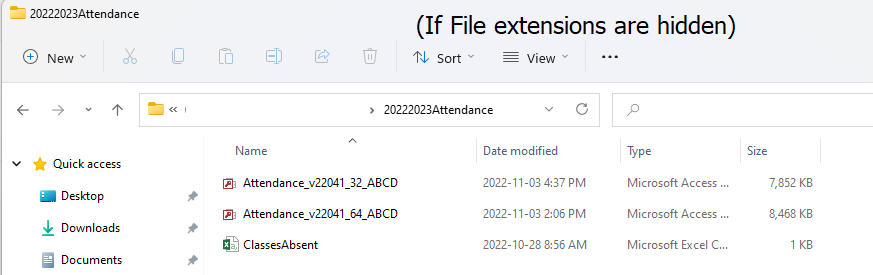
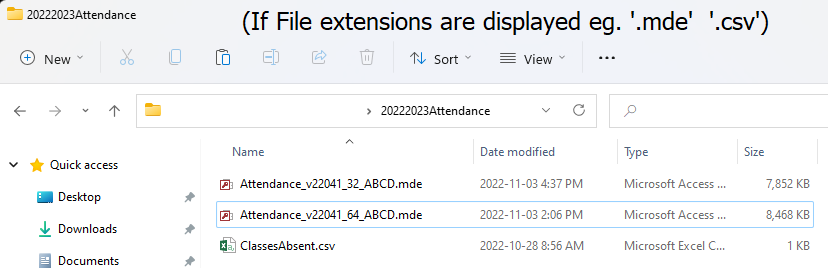
Suggest that you create a folder called 20222023Attendance and save the empty ClassesAbsent.csv file that I have sent to you (or will send) into that folder.
Then, when you create the data below, save it - overwrite the ClassesAbsent.csv files so that it contains your data.
Back to Top of Page
Back to Top of Page
2. Attendance Assistant - Creating the ClassesAbsent.csv file
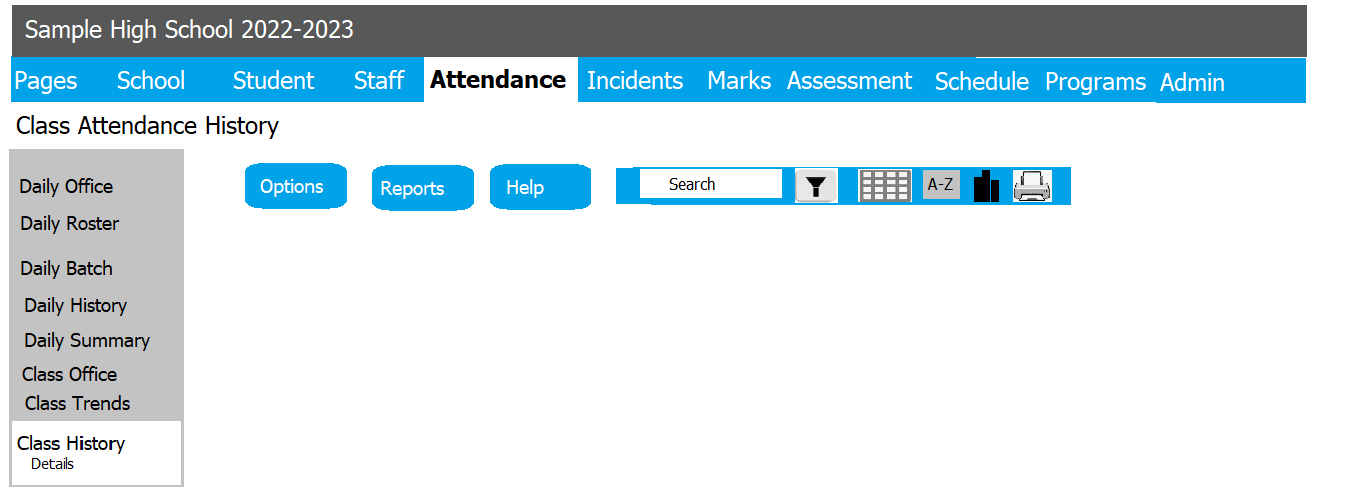
Step 3(i): Attendance, Class History
=======================
In Aspen®, Click on the 'Attendance' tab, then 'Class History'
Step 3(ii): Select a Filter - 'Recent Attendance' or 'All Records' - I think either will work.
===============
Click on the 'Filter' button.

Select either 'Recent Attendance' or 'All Records'
Step 3(iii): Create a Field Set - or, if already created, Select the Field Set
=================
This needs to be done once. Then, each subsequent time, merely select the saved Field Set (possibly named 'Classes Absent Field Set', or similar)
Manage Data Field Set Specific fields need to be included in the ClasseAbsent.csv file.
When you create the 'Field Set', you are able to select those fields and put them in a specific order.
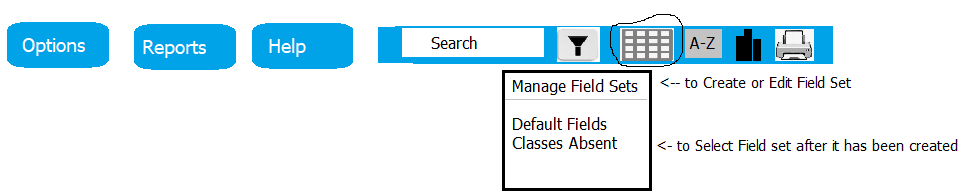
Click on the 'Field Set' Button, Then click on 'Manage Field Sets' to be able to create a new field set, or select Field Set.
After selecting 'Manage Field Sets', you can then create a new Field Set.
Available Fields - select the necessary fields from the list of Available Fields - and Tables.
Need the following fields and in this order:
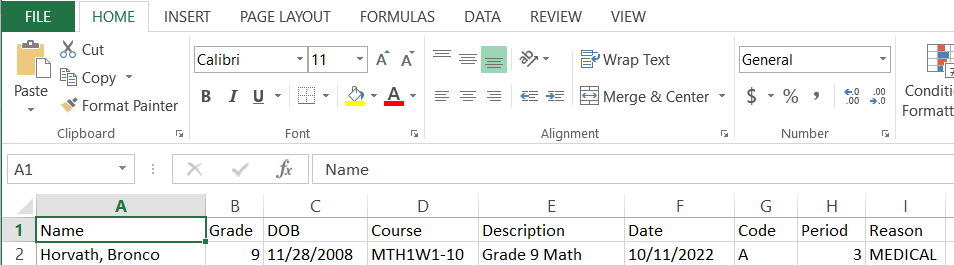
Name (Student Table),Grade level(Student Table),Date of birth(Student Table),Course (Master Schedule Table),Description(Master Schedule Table),Date,Code,Period,Reason,
Note: when displayed in Excel, and when extracted to CSV file, the Field Names appear as:
Name,Grade,DOB,Course,Description,Date,Code,Period,Reason
This 'Field Set' should be saved as Classes Absent (or Nesterenko Classes Absent, or similar)
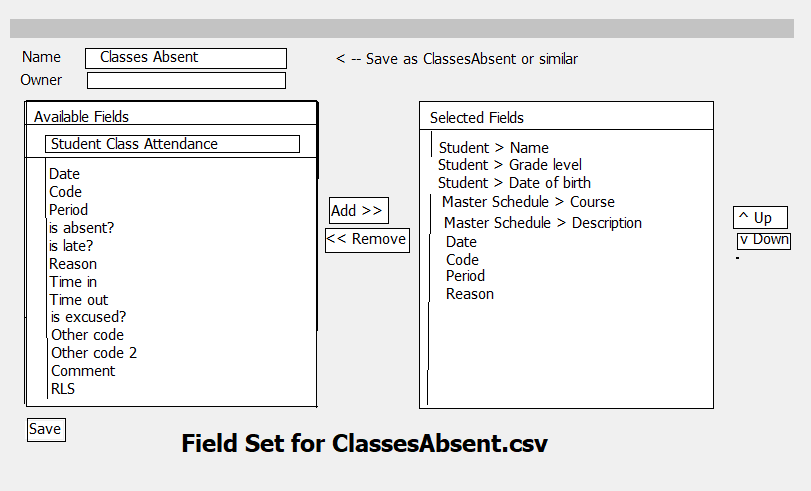
Fields in ClassesAbsent.csv file:
Name,Grade,DOB,Course,Description,Date,Code,Period,Reason
Step 3(iv): Display Attendance data using the created Field Set
=========================================
After Creating and Saving the Field Set, select the Field Set and the appropriate records/fields should be displayed.
Fields viewed in Aspen:

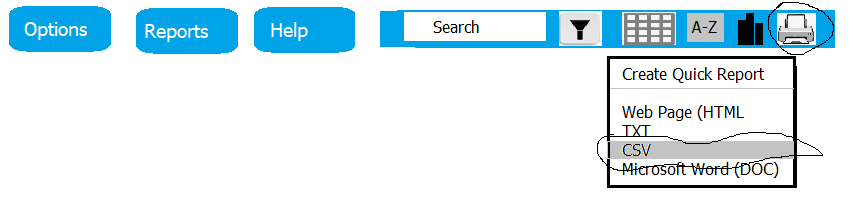
Step 3(v): Save the displayed Attendance data to ClassesAbsent.csv
=============================================
After seeing that the appropriate records/fields are displayed, now extract to CSV.
Click on the 'Printer' icon, Then click on CSV
I believe, in most cases, Excel automatically launches and the data is displayed in Excel.
But, if Excel does not launch, double-click on the QR_7262...CSV filename - then Excel will launch and display the data.
While viewing in Excel, File, Save As, (File Type CSV Comma Delimited) Save or Overwrite as 'ClassesAbsent.csv' Note: You typically have received an empty ClassesAbsent.csv file, so you would always 'Overwrite' the ClassesAbsent.csv file.
It is important that the ClassesAbsent.csv file is saved from Excel.
Fields viewed in Aspen:
Fields viewed in Excel:
End of 3. Attendance Assistant - Creating the ClassesAbsent.csv file
Many Sample Reports are listed farther down below.
But, here are some new reports in the current version of the Attendance Assistant app which accepts Aspen© data.
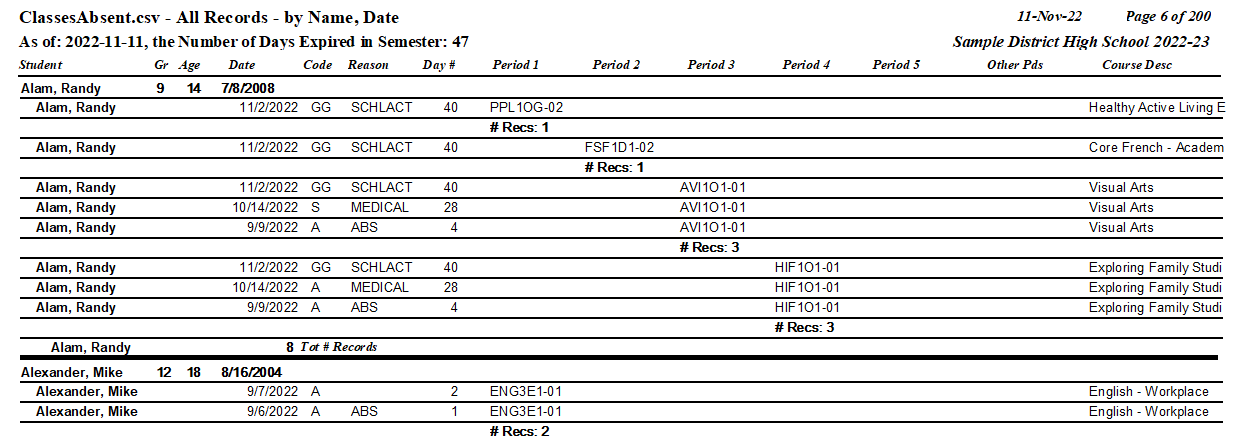
1. ClassesAbsent.csv - All Records - by Name
Typically includes all records (including 'A', 'L', 'GG', etc.) - A different report displays only 'A' records.
Visually separated by Period.
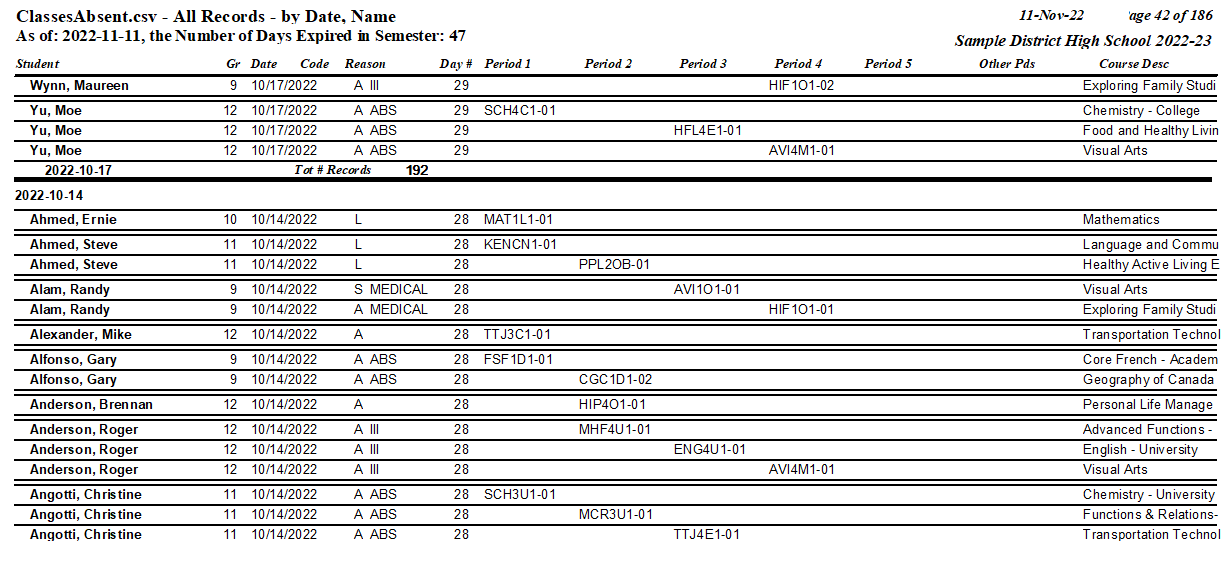
2. ClassesAbsent.csv - All Records - by Date
Typically includes all records (including 'A', 'L', 'GG', etc.) - A different report displays only 'A' records.
Visually separated by Period.
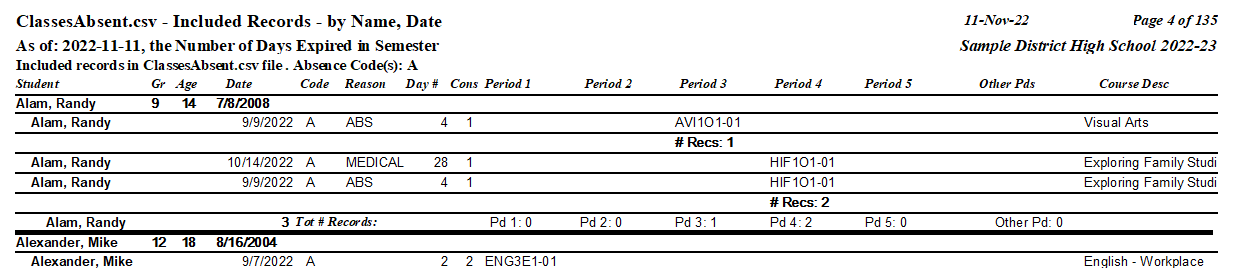
3. ClassesAbsent.csv - Included records (ie. 'A' records only) - by Name
Includes only 'A' records
Visually separated by Period.
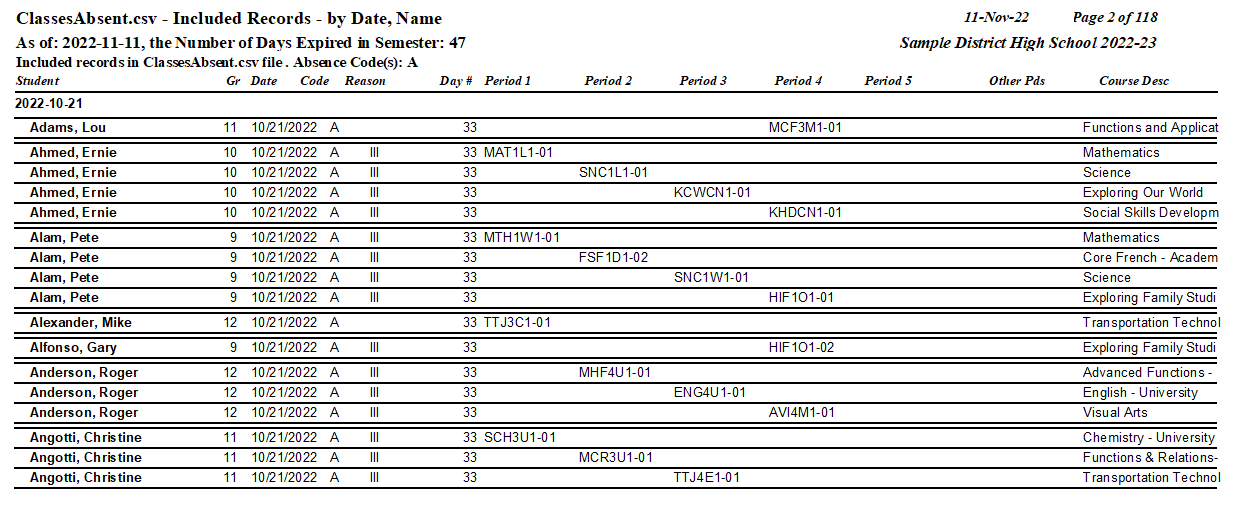
4. ClassesAbsent.csv - Included records (ie. 'A' records only) - by Date
Includes only 'A' records
Visually separated by Period.
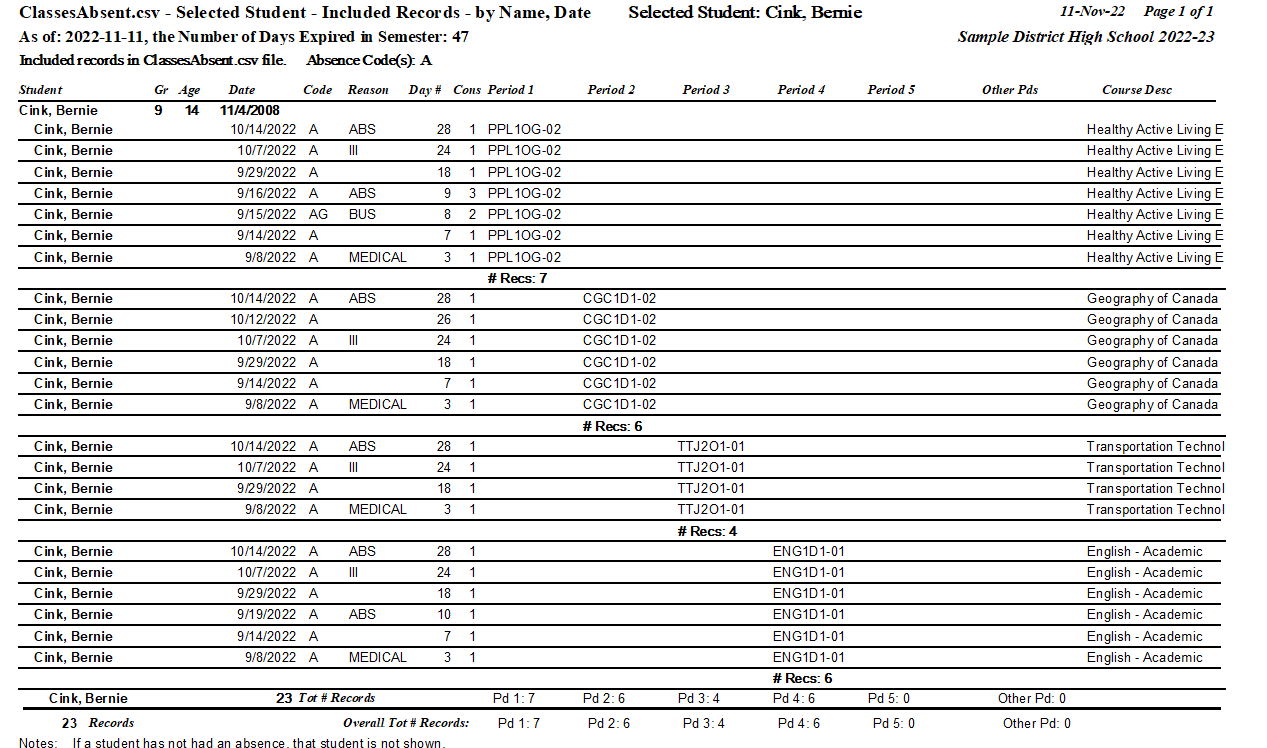
5. ClassesAbsent.csv - Selected Sudent - Included records (ie. 'A' records only)
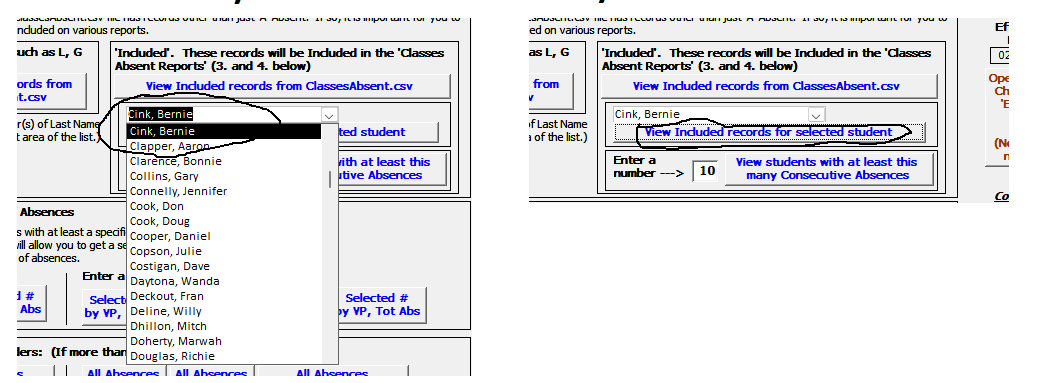
- here user has Selected 'Cink, Bernie' from DropDown list.
Includes only 'A' records
Visually separated by Period.
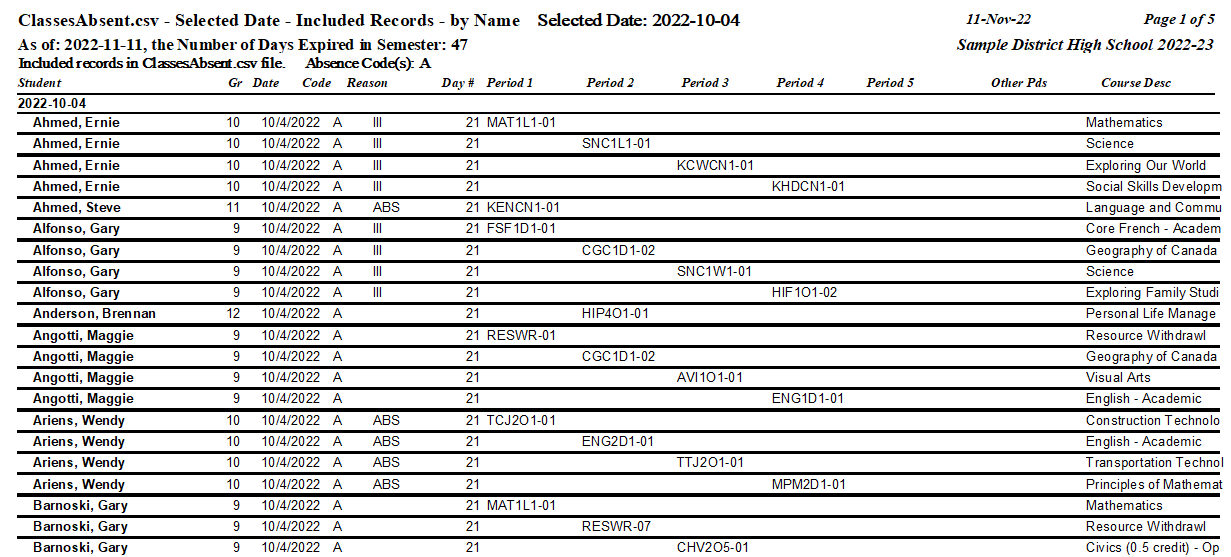
6. ClassesAbsent.csv - Selected Date - Included records (ie. 'A' records only)
- Here User has selected '2022-10-14' from DropDown list
Includes only 'A' records
Visually separated by Period.
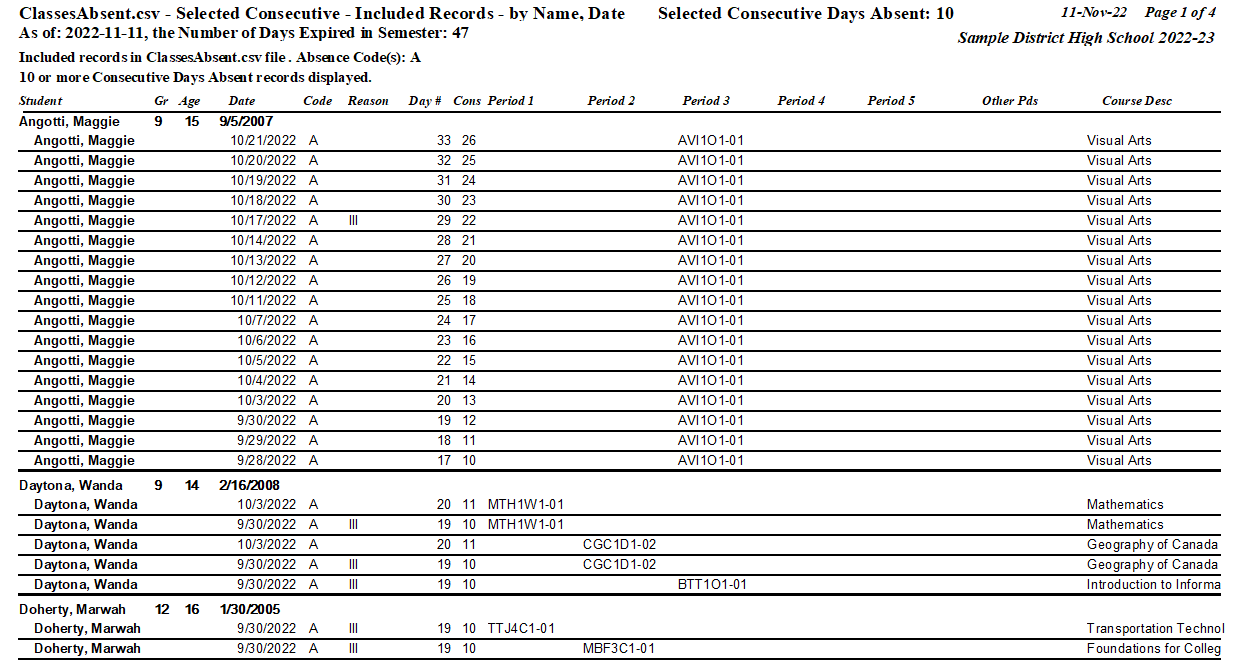
7. ClassesAbsent.csv - Selected # Consecutive Days - Included records (ie. 'A' records only)
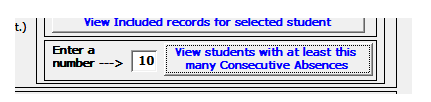
- here user has entered 10
Includes only 'A' records
Visually separated by Period.
In this case, only the records with 10 or more Consecutive days absent are shown.
After getting the Attendance Assistant app setup and ready for use, your 20222023Attendance folder will look like one of these:
Some computers have 'File Explorer' settings set so that known file extensions are not displayed.
Some computers have 'File Explorer' settings set so that all file extensions are not displayed.
Back to Top of Page